

How to wire an ES-335 - Our in depth video and photo step-by-step guide to wiring an ES-335
Welcome to our in depth guide on wiring an ES-335. The ES-335 (or similar semi hollow bodied models) such as the Casino, ES-330 etc...are very popular - the combination of the classic Gibson setup but with a hollow body offers a unique sound which makes it one of the most adored guitars around.
In this guide, we'll show you how to wire an ES-335 using our wiring kit. We'll be wiring it in the classic "Gibson" style using braided hook up guitar wire. It will also be in the popular "50s" style wiring. This wiring setup is electronically identical to that of a Les Paul and as usual we'll take you through each step of the way - you can refer to the video above or read the full guide below. We recommend you get familiar with the wiring diagram and the video before starting. There is a wiring diagram at the end of the article - print it off or have a copy to hand too!

You will need:
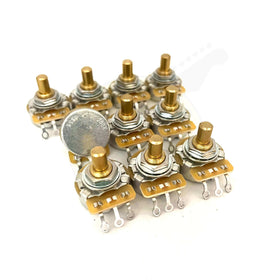
- 4 x CTS 500k audio pots (short shaft)
- 1 x Switchcraft toggle switch (our kit comes with either the short frame or classic frame)
- 1 x Switchcraft 1/4'' jack socket (long thread)
- 4ft braided hook up wire
- 2 x capacitors of choice (we recommend 0.022uF)
- 3.2mm heat shrink tubing (optional)
- Wiring diagram
All of the above components are available from our guitar electronics range individually or in the form of a wiring kit.
Tools Required
- Wire cutters
- 60w soldering iron (preferably with adjustable temperature settings)
- Lead free silver solder
- Some sturdy cardboard/acrylic (for a template)
Tinning is Winning
As with each of our wiring guides, keeping your soldering iron tip clean and tinned, as well as tinning the wires and components is crucial. Use some brass shavings or a damp sponge to keep the tip clean and make sure to wipe of excess build up before making each solder joint.
Step One - Make a Template
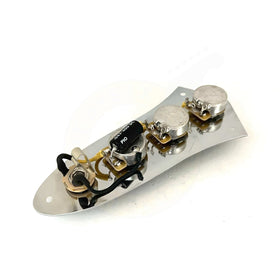
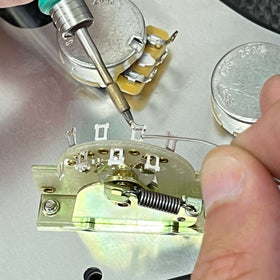
The problem with the 335 model guitar is that there is no back control panel for easy access - so you'll have to do the wiring outside of the guitar. Using a piece of sturdy cardboard or plastic, make a template by placing it underneath the controls of the guitar and tracing the pot and switch holes. You can then drill these holes out to make an accurate template. Assemble the pots and switch as per the below photo - you can label each hole if need be.

Step Two - Grounding the Pots
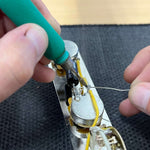
Next, ground the unused lugs on the volume and tone controls (exactly the same as Les Paul wiring). This is the outer lug of each volume pot from a birds eye's point of view, and the middle lug (output lug) of each tone pot. The easiest way to do this is to bend the lug onto the back of the pot casing and solder it in place. Refer to the below photos.
First, fill the lug with solder.

Bend it back onto the pot casing and solder into place. The heat from the iron will re-flow the solder in the eyelet and create a bridge to the pot casing, thereby grounding the lug.

Step Three - The Toggle Switch
As mentioned, we are wiring our 335 circuit using Gavitt braided wire - this stuff is great for space saving - it is essentially two wires in one.
The outer braid is used as ground whilst the inner black cloth wire is our signal.

Moving onto the switch, we will use a combination of 2 types of wire: braided wire and a bit of tinned copper wire (it is not as complicated as it seems!) As mentioned before, this wiring setup is electronically identical to that in our Les Paul wiring guide, it is just spaced differently. Let's break it down...
Take a 10cm length of tinned copper wire (or remove the cloth from some cloth wire) and thread this through the ground lug of the toggle switch (this is the middle lug).

Next, take a length of braided wire, pull the braid back and connect the inner cloth wire to the the volume output lug next to the ground lug. If you are using heat shrink tubing, cover this joint and shrink it down.

Repeat this process on the second volume output lug.
Our third and final length of braided wire goes to the jack output lugs. These two lugs need to be bent together and the inner cloth wire of our final braided length to be bent through and soldered through both of them. Push back the outer braid, reveal the inner cloth wire and solder to the lugs on the switch. The output to the jack lugs (there are 2) need to be bent together - make sure the wire goes between both lugs.
N.B. the braided length we solder to the bridge volume output needs to be longer - approx. 1.5ftm as we will use this to ground all four pots together, running round to the bridge volume pot.
To complete the switch, we need to ground everything. Bend the length of tinned copper wire around the three braided wires, nice and snug but not too tight and then solder this in place. From this point on, the outer braids of each wire act as the ground wire (whilst the signal wire is the inner cloth wire).

Step Four - Connecting the jack
For the jack socket, it is very important to identify what the two lugs do. The inner ring (sleeve) is the ground lug, whilst the outer lug (tip) is the hot/signal lug. When it comes to braided guitar wire, we need to solder the outer braid to the ground lug of the jack and the inner cloth wire to the hot lug.

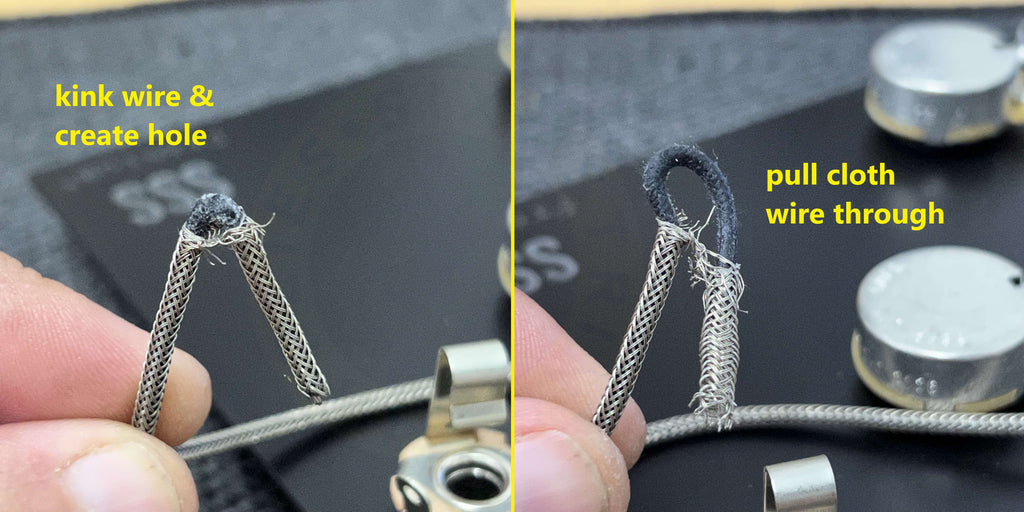
Start off by separating the outer braid from the inner wire - you can do this using a pair of fine nosed cutters and cut up the length (like a surgeon does when cutting a patient's trousers) or or by splicing apart the braid and pulling the cloth wire through. The separated braid needs to be twisted together and snipped off, leaving a small ledge or tail approx. 5mm long.
Once ready, it is advisable (but optional) to cover the full length of braided wire running from the switch to the jack with the 3.2mm heat shrink tubing provided with the wiring kit. This stops the braid (which is now acting as our ground) from touching anything it shouldn't and therefore creating a short circuit (ie. no sound).

Solder the inner cloth wire to the signal lug (tip) of the jack - use a small length of heat shrink rubber tubing to cover the joint. For grounding, solder the protruding tail of braided wire we created earlier to the ground lug. Bend it through - this creates a mechanical connection. Refer to the below photos.


Step Five - Grounding
The beauty of working with braided guitar wire is that can use to ground all four pots together AND connect the switch output to the volume control using the same piece of wire. Ground the outer braid of the wire from the switch to the neck volume control pot casing. The inner cloth wire needs to be soldered to the output lug (middle lug) of the volume pot. You can watch this video on how to do this.

The idea is to run the braided wire around the outside of the pots, grounding it to each pot along the way. This grounds the four pots together and by putting the wire on the outside, you avoid the potential risk of having wires visible through the f-holes once installed in the guitar. Cover the braid with 3.2mm rubber tubing between each pot if necessary (again, optional but strongly advised).

Repeat this process for each pot until you get to the bridge volume control. At this point, we will be grounding the braid to the pot and connecting the inner cloth wire to the middle lug (output lug) of the pot. As we did earlier, either cut away or separate the outer braid from the inner cloth wire, twist the loose strands together and cut. The inner cloth wire then gets soldered to the middle lug of the pot, and the outer braid gets grounded to the back of the pot casing, as in the below photos.

Step Six - Capacitors
Install the capacitors in the same way for a Les Paul. In our setup, we are using the popular "50s" wiring. So your capacitor runs from the output lug of the volume control (middle) to the lower lug on the tone control. We are using 0.022uF which are typical values to be paired with humbuckers, but you may find using 0.047 or 0.033 will give you a better roll off. Use the 1.5mm yellow rubber tubing provided in the kit to cover the capacitor leads.

That is how to to wire an ES 335 harness.
All that remains...well is the complete hassle of feeding it through the f-holes! Not before we have connected our pickups though! Each pickup gets soldered to the input lug of each volume control (lug 1). Ground each pickup to the pot casing as per the below wiring diagram.
Remember to also connect the main ground from the bridge/tailpiece to the pot casing too before you feed everything through the f-holes!
We will do a video shortly on how to actually install this inside your guitar - getting everything through the pickup hole can be bit of a battle! In the meantime, here is a great video demonstrating a good way to install these types of kits in semi hollow bodies.

This is available as a prewired kit, ready to install into your guitar.

How to Wire a Les Paul (50s style)
Coil Split Les Paul (modern wiring)