
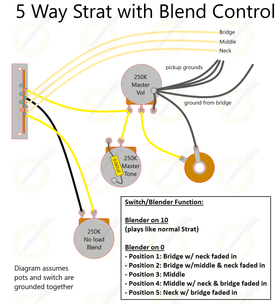
Welcome to our step by step photo guide to wiring a Stratocaster. We'll take you through each step in detail so you can either follow along or do it yourself at your own leisure. There is a detailed wiring diagram at the end of the article - we recommend you familiarize yourself with this diagram and this guide before starting. This guide is based on our Strat wiring kit.
You will need;
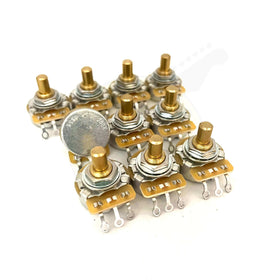
- 3 x 250k CTS pots
- 1 x Switchcraft 1/4'' mono jack socket
- CRL 5-way switch
- 1 x 0.047uF capacitor
- 1 x Treble bypass capacitor (optional)
- Push back cloth wire
- 3.2mm diameter heat shrink tubing (optional)
- Wiring diagram
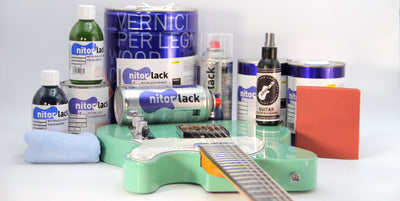
All of the components involved are available in our electronics section individually or as a complete wiring kit.
Things to note before we start:
- We'll be working with push back cloth guitar wire - black acting as the ground and yellow or cream as the hot/signal.
- The best part of wiring a Strat is that you can do it on the pickguard and drop it into your guitar afterwards. That being said, find a clear, well lit and flat workspace to do the wiring away from your pride and joy! We don't want solder splash ruining the finish. Unless it's a *relic* finish, in that case, crack on.
- Ensure your soldering iron is tinned and at a suitable temperature. We recommend using an iron with a minimum wattage of 25w and are able to control the temperature. If it gets too hot, your iron tip will oxidise too quickly and the solder will just ball up and not stick to anything. Too cold, and you'll end up with cold joints. Try and find a balance by practicing on different wires and components before hand. A lower temperature setting is ok for soldering the wires to the various pot or switch lugs - however a higher temperature is ideal for soldering to the back of the control pots. If using an adjustable temperature, set your iron to 350°C.
- Practice makes perfect - guitar wiring can be very frustrating when first starting. It's advisable to practice on some cheap components and wire to work on your technique and get a feel for your soldering equipment and the flow of solder. Its not the end of the world if you muck up but nobody wants to pay for replacement components that you have already bought once!
- It is recommended that you "tin" the lugs and your soldering iron before starting. Using the soldering iron, add solder to the ends of the wires you will be using and to the lugs of the switch and pots. Tinning the components beforehand makes for an easier mechanical and electrical connection.
- Keep your soldering iron clean and tinned at all times. Tin the tip by coating it in solder. Use either a damp heat resistant cloth or brass/steel shavings to remove excess solder and residue.
STEP ONE
Assemble the components as per the below photo. The lugs of the two tone pots need to be facing each other. The spring of the 5-way switch needs to be facing away from the tone and volume pots. (This isn't essential - the 5 way switch will work the same regardless of which way it is facing). Depending on the dimensions of your pickguard, it is wise to bend the lugs of the tone pots back a bit so they are parallel to the pot. Leave the pickups to one side for the moment - we'll do the harness first.

STEP TWO
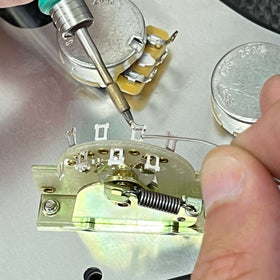
Tin the lugs of the pots and switch that you will be working on. Tinning before making the final connection makes it a lot easier. Hold the soldering iron to the side of the pot or switch lug (either underneath or behind) and apply a tiny amount of solder to the lug from the other side. Do not apply solder direct to the iron. The solder will run along the lug, tinning it nicely. It only takes a little to lightly coat it - you do not want to fill the lug with solder.

STEP THREE
Ground the lug that will not be used on the volume pot. This is the lug furthest away from the switch (nearest the edge of the pickguard). There are two ways to doing this. You can either take a snippet of bare ground wire and connect the lug to the back of the pot, or, bend the lug onto the back of the pot and solder. Do not blow on the joint to try and make it cool faster - just remove the soldering. It will cool in a matter of seconds. Refer to the below photo.

STEP FOUR
Using the black cloth wire, lay a ground wire running from the volume pot to the tone pots. It does not need to be a continuous wire. Try and keep your solder points as close to the edge as possible of each pot (the volume pot will also be ground point for the pickups, the output jack and where you will run the ground to the tremolo claw or bridge). Alternatively, use tinned copper wire (sold separately). You can also solder this ground wire to the side of the pots as we have below.
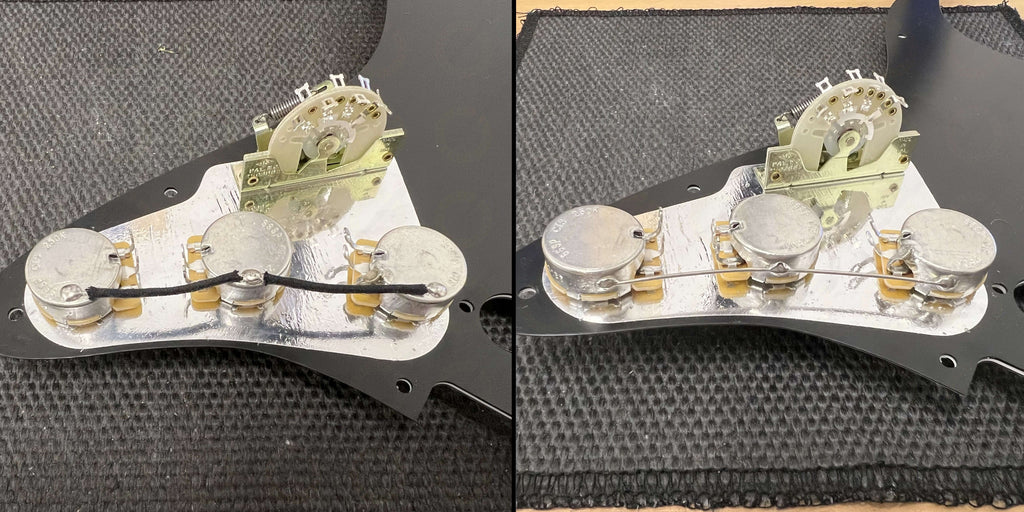
You can avoid this step altogether - for a neater and cleaner job you can use any of the Strat grounding plates we stock - either control area sized or full pickguard sized. Using aluminium plates, your components are solidly grounded. The problem with relying on the pickguard foil is that the teeth of the lock washer can dig into it and scratch it away, fairly quickly. So if this is the case, re-enforce the ground connection between the pots by wiring them together.

STEP FIVE
Having laid down the ground wire it is now time to move onto the 5-way switch. You'll notice that the switch has 8 lugs in total, 4 on each side. The four lugs facing towards the pots are the ones we need to connect to the volume and tone controls. The 4 on the other side are for the pickups. Refer to the below diagram - from now on we will refer to these lugs as 1-8 where 1 to 4 are facing inwards and 5 to 8 are facing outwards.

STEP SIX
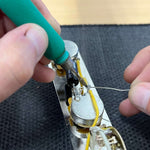
Using the cream push back wire provided in the kit, you need to connect lug 8 to lug 1. These are the common lugs on the switch - common lugs are always "on", regardless of what position the switch is in. You can either go directly across the switch or down and back up as we have done below. Push back the cloth a little on each side of the wire and lightly tin it before putting it through the lug. Once it is sitting in the lug, apply heat and solder with the soldering iron tip until the lug is filled and the joint is complete. Let it cool naturally.
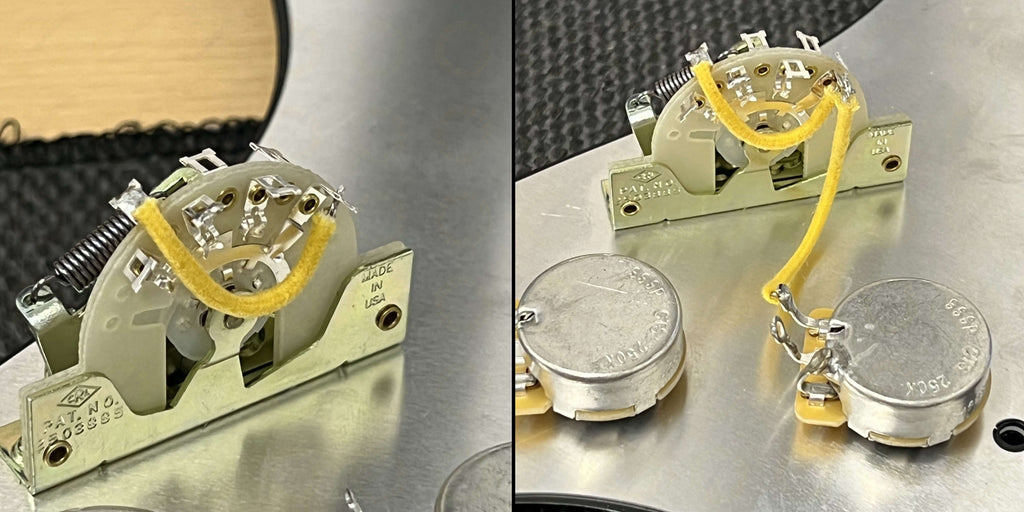
Next, connect lug 1 of the switch to the input of the volume pot (lug nearest the switch) as shown in the photo. Again, tin the wire ends before connecting. Run the wire down the length of the switch and directly across to the volume pot.
STEP SEVEN
Next, again using cloth wire, connect lugs 3 and 4 of the switch to the tone pots respectively. Lug 3 connects to the inner lug of the second tone pot, whilst lug 4 connects to the middle lug of the first tone pot. Refer to the below photos. As always, push the cloth back a little from each end and tin the ends of the wire before putting into the tinned pot lugs.
If you want to connect your bridge pickup to the tone control, then you can add a little jumper wire from lug 2 to lug 3. This is a popular and easy mod to do, however, this does mean the pickups have additional "load" which they were not designed for.

STEP EIGHT
The capacitor - the capacitor will sit on the 1st tone pot. One wire will essentially connect the two tone pots together while the other end will get grounded to the back or the side of the pot. Refer to the below photos. We are using the optional PIO (paper in oil) upgrade in the wiring kit. Feed one end of the capacitor to the most outward lug on the first tone pot (furthest from the switch) and thread it through to the middle lug of the second tone pot. You will need to cut the lead wires of the capacitor to length. Solder both connections and ground the other wire of the capacitor to the pot casing.

STEP NINE
If you are using the treble bypass (aka treble bleed) - this gets soldered to the input and output lugs of the volume pot. Again, as with the main capacitor, cut the wires to a suitable length and add some heat shrink rubber tubing or cloth to prevent them from coming into contact with the pot casing (ground). Refer to our guide on installing a treble bleed if you need more information on this.

Finally, you need to install the jack leads BEFORE connecting the jack. The hot/live wire goes to the output (middle) lug of the volume control, while the ground goes to either the back or the side of the volume control. We have chosen the back for ease of soldering!

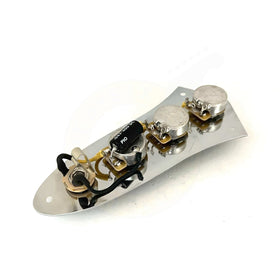
After completing the above steps, you should now have the initial harness. The final two steps cover wiring and connecting the Switchcraft jack and installing your pickups.
STEP TEN
Obviously, your pickups of choice need adding to the mix. Single coil pickups come with two lead wires, one is the ground, the other is the hot/signal wire. With all three pickups fixed into the pickguard, you can use some heat shrink tubing to funnel the lead wires in the same direction (cable ties are also a great way to keep your wiring neat and tidy)
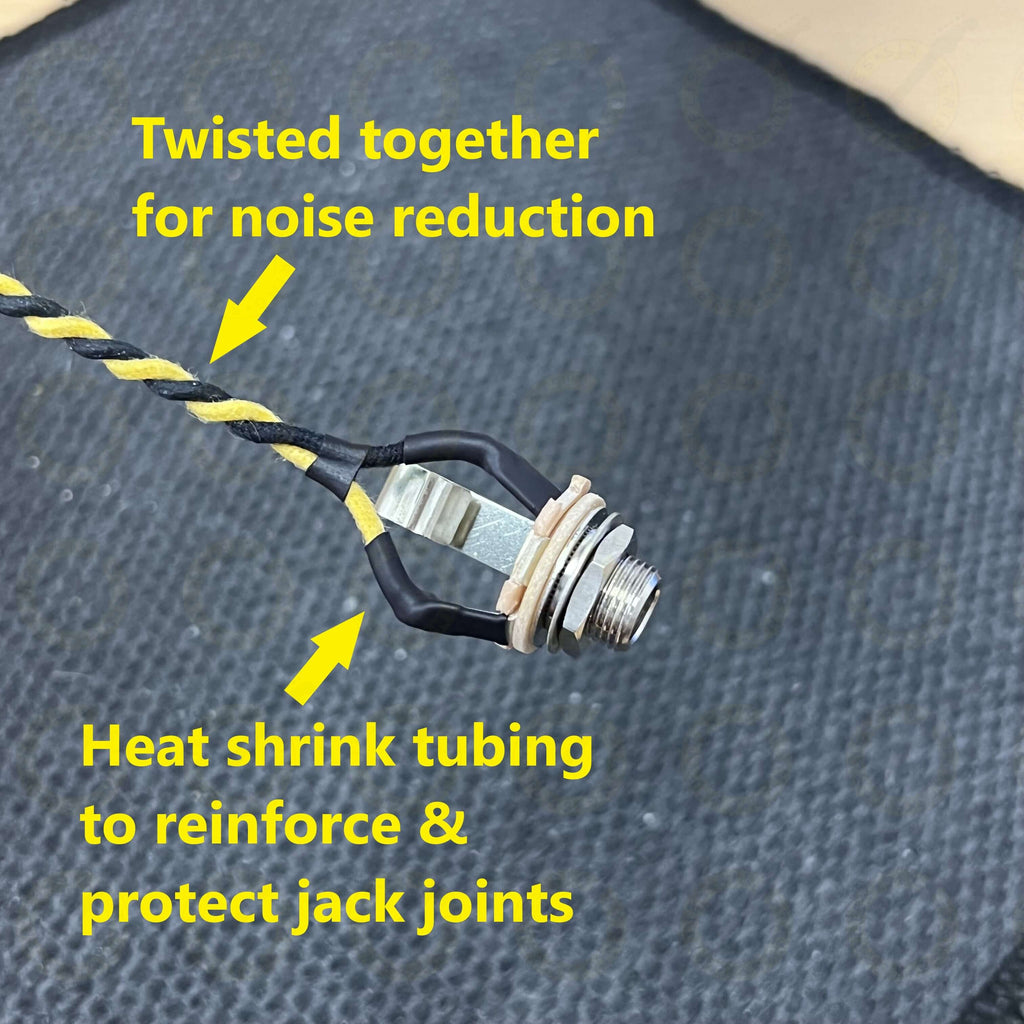
It is a good habit to twist your ground and signal wires together (but not essential) - it helps reduce unwanted feedback (the ground wrapped tightly to the signal wire acts as shielding).

Firstly, twist the ends of all three pickup ground wires together (this is normally black) and solder them together to the back of the volume pot.

Next connect the hot/live wires. Follow the below list and refer to the wiring diagram.
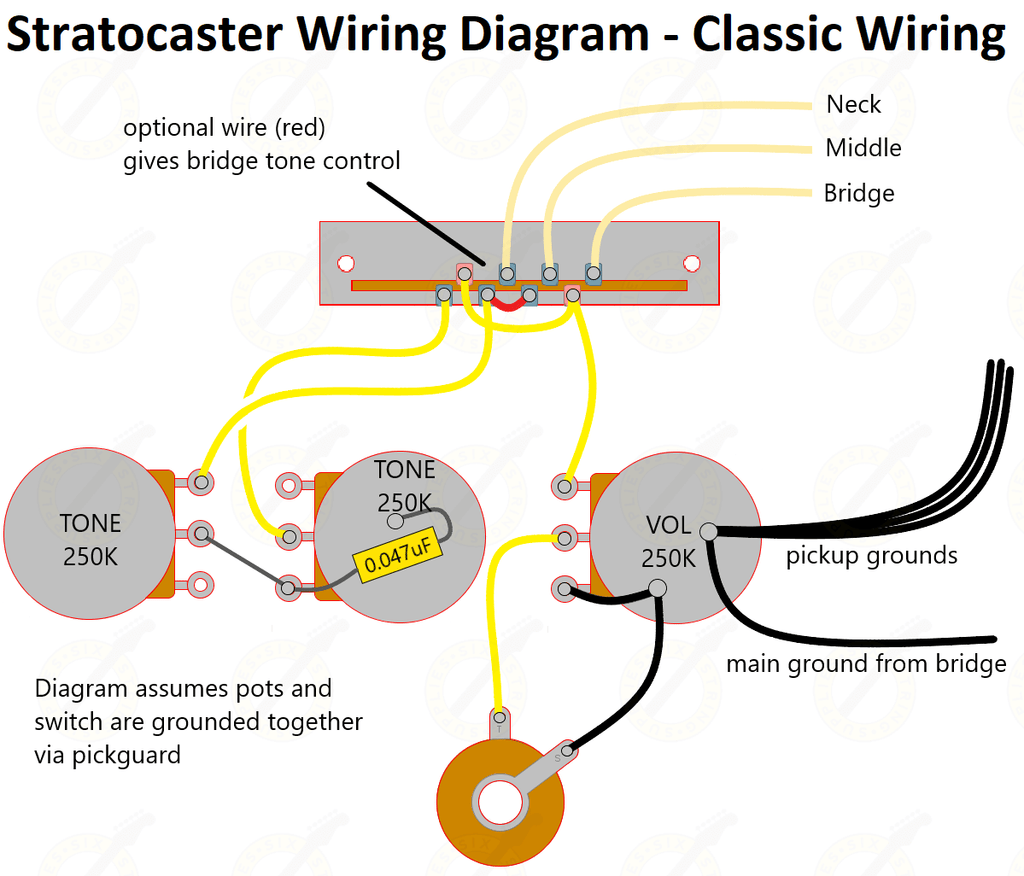
- Bridge pickup - to lug 5
- Middle pickup - to lug 6
- Neck pickup - to lug 7
STEP ELEVEN
With the pickups installed, thread the two jack wires through the hole inside the guitar's body that runs to the jack cavity. Following the below photos, attach the hot and ground wires to the jack.
Ensure you solder the correct wire to the correct lug. Our ground connection (we're using black wire) gets soldered to the inner ring of the jack socket. This is the sleeve/negative. Our signal connection gets connected to the hot/tip lug.

Thread the black wire through the ground lug (sleeve) and the yellow wire through the signal lug (tip). With each wire, ensure it is a true mechanical connection - by bending the wire through the hole and round so the wire is in solid contact with both sides of the solder lug. Then solder it in place, as per the below photos.

This is where the heat shrink tubing comes handy. It is optional but it helps to keep your wiring tidy and provides extra protection around the joints of the jack.
The jack cavity can be a little cramped and if you are using shielding equipment in the form of copper/aluminium foil or shielding paint, the circuit can short if the signal lug of the jack come into contact with these materials. If you're not using shielding equipment, then no issues.
Cloth wire is superb in its own right at reducing feedback when the ground and signal wire are twisted tightly together - refer to the below photo.
STEP TWELVE
Depending on your guitar, you may or may not already have a ground wire from your tremolo or to the bridge. If not, simply solder 1/2ft black cloth wire to the ground point on the back of the volume pot and solder it to the tremolo claw. You should have a tiny hole inside the cavity (after the pickups, before the bridge) which you can run this ground wire through. Solder it to the little latch on the tremolo claw.

So there you have it - how to wire a Stratocaster. Its not as difficult as it appears. Once you're sufficiently skilled with a soldering iron there are more exotic wiring options you can try including a 7 or 9 way setup using push pull pots. Have a look at our wiring diagrams for setups that offer a little more va va voom.
Guitar and Bass Magazine have a great article on 25 different ways to mod your Strat. Premier Guitar have some wiring mods to try, including the "Nashville" Strat which replaces the 5 way switch with a Telecaster style 3 way switch. You can also replace the volume control with a push pull pot, aka 7 way Strat wiring, which activates the bridge pickup on command.
We stock a range of prewired Stratocaster kits including classic, blender pot control and a solderless version - all available in our prewired harnesses range, including a top of the range loaded Strat pickguard.
More Guides
Copper Shielding - How to Shield a Guitar
How to wire a Switchcraft 3-way toggle switch
Gilmour Strat Wiring Mod (7 Way Strat)
Strat Bridge Pickup Tone Control Wiring
Guitar Wiring FAQ