
*PLEASE NOTE - Every single prewired harness is thoroughly checked before shipping. We cannot be held responsible for mis-use or incorrect installation. If you are inexperienced at soldering, lack the equipment or don’t have the confidence to work on the insides of your guitar, we strongly recommend you take your guitar/bass and the harness to a reputable guitar tech to install for you.*
Thankyou for purchasing one of our guitar wiring harnesses. Every order we get allows us to reinvest in our products, our stock range, our equipment and our website content (including useful guitar wiring tutorials and videos).
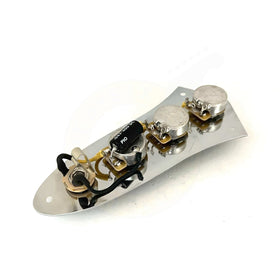
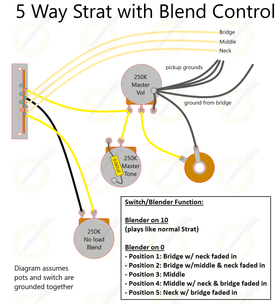
This guide will give you useful tips and guidelines to installing your new wiring harness. Further instructions are provided in the form of our easy to read wiring diagrams. Each harness comes with its appropriate diagram.
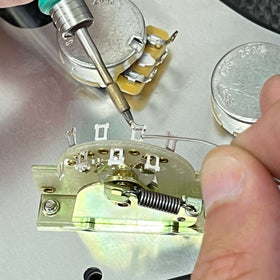
The beauty of buying a prewired guitar harness is that the majority of the soldering has been done for you. However, despite being prewired, there is still an element of soldering required to get everything up and running.
General Tips
- Most household soldering irons are good enough to get the job done. However, if you have a decent soldering station or intend to solder regularly going forward, it might be worth investing in a 50w temperature adjustable iron.
- Solder is readily available. For home use, you can use 60/40 lead tin solder. If you are using lead free solder, be sure to use solder with added silver (it’s a lot easier to work with!)
- Keep the soldering iron tip clean by wiping it on brass shavings or damp sponge.
- Each harness is supplied on an accurately cut template. This can be kept aside and used for future wiring jobs.
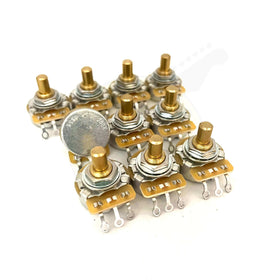
- All our of prewired harnesses use US imperial sized pots/jack sockets and switches. You may have to ream the potentiometer holes in your pickguard or body to fit the larger US sized pot shafts.
- This also applies to control knobs – if you are installing your harness into an eastern import, it’s control knobs won’t fit the CTS pots and you will need US sized control knobs.
Installation
1) Remove the harness from its template and place inside the guitar’s control cavity or pickguard.
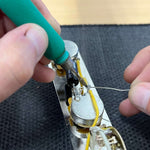
2) Connect the main ground wire from the bridge to the pot casing of the most suitable pot (this is normally the volume pot, though any pot will do).
3) Connect your pickups as per the wiring diagram provided. Each pickup will have a hot (signal) wire and a ground wire. You’ll need to solder the hot wire to the switch or pot lug indicated on the supplied diagram. Each pickup ground wire gets grounded (again, typically on top of the pot casing).
4) Once everything is soldered, you can test that your circuit is working by doing a simple test (before re-stringing). Simply plug the guitar into an amp and using a blunt metal object (a screwdriver is ideal), tap the pole pieces of the pickup. Adjust switch positions, volume and tone controls accordingly. If you hear a “click” when you tap the pickup, its working.
5) Re-string your guitar and you’re ready to plug and play.
Every single guitar wiring harness comes with its individual wiring diagram. We also have a range of wiring tutorials and videos offer general soldering advice. Installation is simple – however if you feel unable to do it, take it to a reputable tech to install for you.