

In this guide (and the above video) we will show you how to create a perfectly grounded “Faraday cage” protecting your guitar’s electronics from outside interference using copper shielding tape, the most popular way to shield your guitar. This guide covers how to shield a Strat but the principle is the same regardless of what model you use.
Kill The Buzz!
Electro-magnetic interference (EMI) is a common feature of electric guitars. Interference from other electrical devices such as amplifiers and lights can cause unwanted electronic feedback (especially when playing on a stage with lots of gear and stage lights). It is particularly common with single coil pickups (more so than humbuckers), which is why many guitarists opt to shield their guitar.
The Science
The idea of shielding is to create a grounded “Faraday cage” around the electronic components (basically a grounded conductive enclosure) inside your guitar - pots, switches, wiring and pickups etc… The electronics inside your guitar act as antennae for nearby electrical equipment and so unshielded guitars are vulnerable to the inevitable feedback. This is caused by radio frequencies and electrostatic fields.
Creating a Faraday cage around the electronics and wiring helps to protect the guitar from external devices and reduces unwanted feedback by blocking incoming frequencies.
It’s not just shielding that helps to combat this feedback – insulated wire and superior quality components all help.
Conductive shielding paint or Copper/Aluminium Tape?

There are two main methods to shield a guitar – shielding graphite paint (conductive paint) or more commonly, aluminium or copper tape.
Many guitars will come from the factory with conductive paint covering the control and pickup cavities but this is not always the most effective way to shield a guitar. On top of this, conductive (graphite) paint is a lot more expensive – you only justify the price if you are shielding several guitars. It also takes several coats of the paint to reach a suitable level of continuity.
Copper or aluminium tape are more readily available and a cheaper alternative.
To shield your guitar you will need;
- 2-3m of 50mm wide copper shielding tape (with conductive adhesive)
- Scissors
- A digital multimeter

NOTE - while this is hardly a dangerous job, the edges of the copper foil tape can become very sharp. Watch your fingers!
The Pickguard
We’ll start by shielding the pickguard. Most Strat pickguards will come from the factory with aluminium foil acting as a grounding plate surrounding the switch, tone and volume controls. This is sufficient for a grounding plate but offers little to no shielding and not even close to creating a Faraday cage.
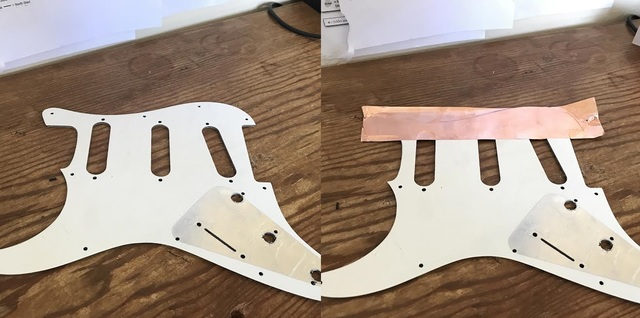
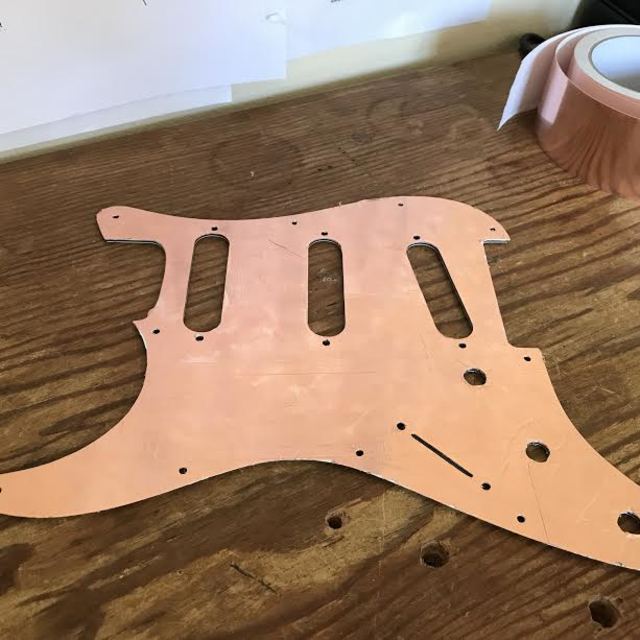
Using your 50mm wide copper tape – lay strips across the pickguard, covering it length ways. Make sure each strip is in contact with the previous by overlapping each strip by 5mm or so. Keep laying down strips until you have covered the whole pickguard. Use your scissors to cut the tape to the desired length. Each strip of tape needs to be as flat as possible with no tears or gaps.

Once the whole pickguard is covered, use a box cutter or suitable blade to carefully trace through the pickup, controls and screw holes.
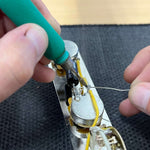
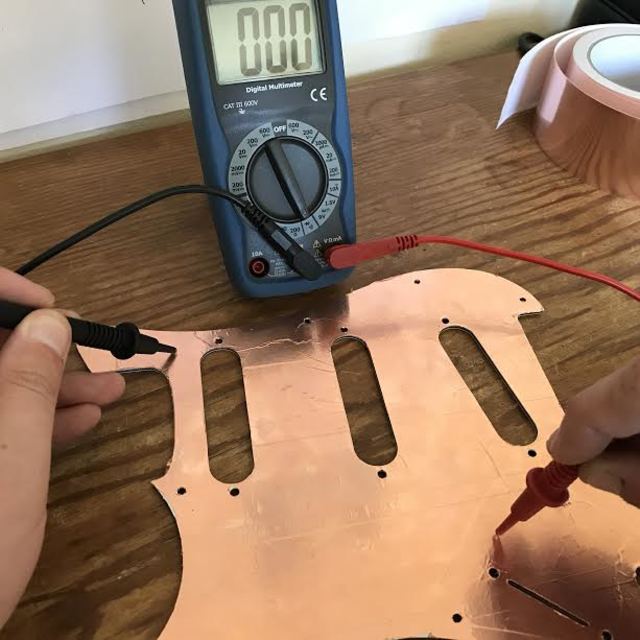
To test conductivity – use your multimeter on the continuity test setting….if you have done it properly, you should have full conductivity between any two given points on the pickguard.
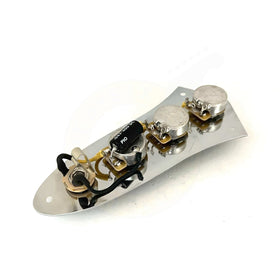
Or you can cheat like we have done here! To save on tape you can use these excellent aluminium shielding plates designed for Strat pickguards. They are very effective and were used on vintage Strats back in the 50s and 60s.

The Body
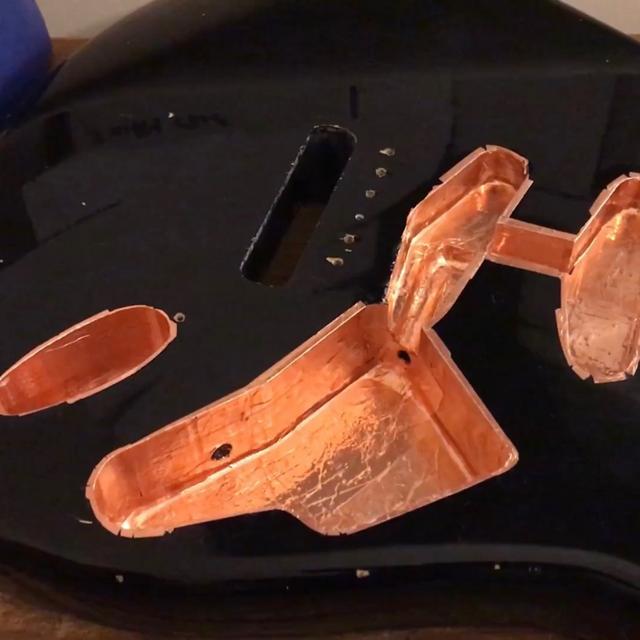
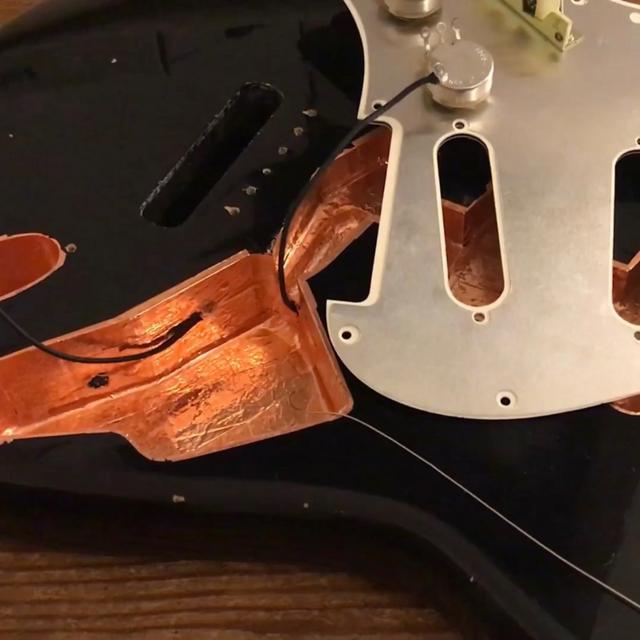
Use the same principle when shielding the inside of the body – carefully lay cut to size strips which overlap each other. Your scissors will become useful to cut strips to desired lengths and smaller widths to fit copper into all the little nooks and cranny’s. Use cut strips of copper tape lengthways running up the sides and use the full width (50mm) to do the floor of the cavity.
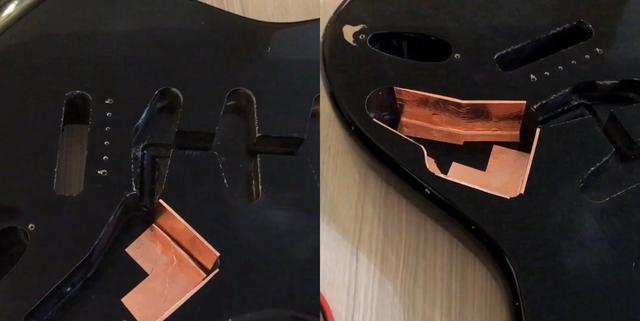
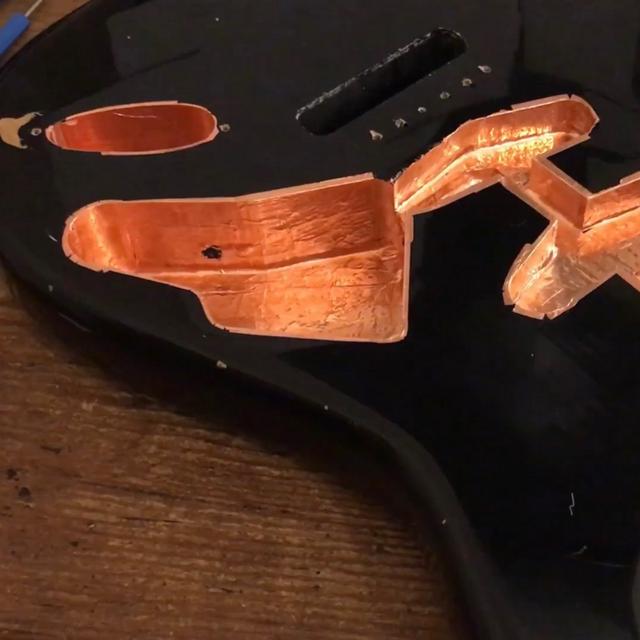
Most importantly – make sure the tape runs up the sides and on to the top of the body as shown in the photo below. The idea being, when the pickguard is screwed back into place, the copper or aluminium plate on the underside of the pickguard comes into contact with the copper within the body, thereby creating the Faraday cage.
Repeat this process until the whole cavity is covered. Pay attention to ensure each strip overlaps the previous one, as well as making sure the tape goes over the edge.
After laying down the first two to three strips, take your multimeter and test for conductivity. If you are using copper tape purchased from our website, the adhesive on the back is fully conductive. However some tapes do not come with conductive adhesive - in this case, you would need to use solder across the seam of each strip to join them together.
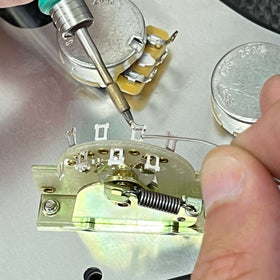
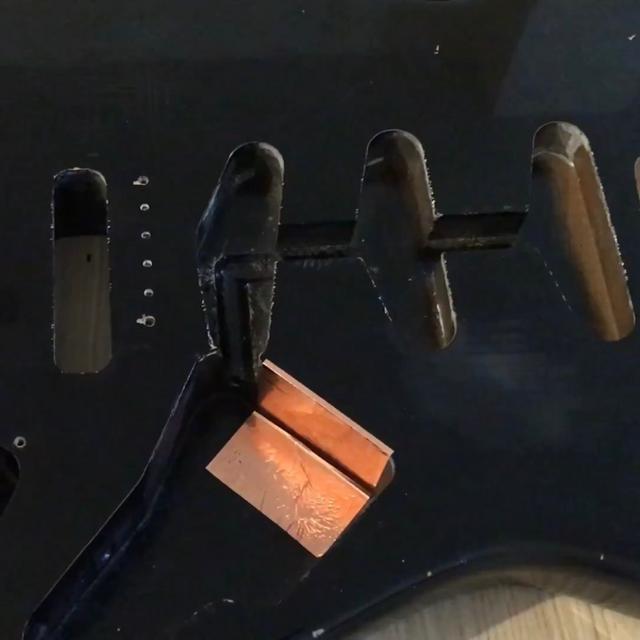
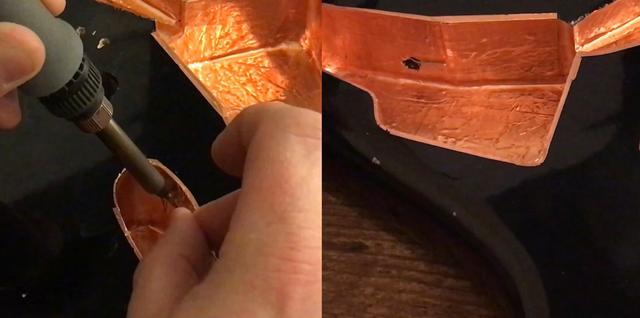
Once you have fully covered the main cavity and jack cavity, ensuring no holes or gaps (other than the hole for the bridge ground and hole from the main cavity to the jack socket cavity) you need to connect the two cavities together. To do this, take a jumper wire (we are using tinned copper in this instance) and thread it through the hole where the jack socket wires go. Bend it around the corner and solder each end to the copper tape. Once this has cooled, cover the solder joint with copper tape. Refer to the below photos.
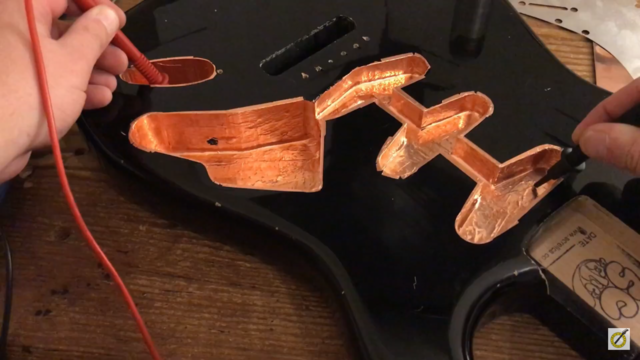
Once you have soldered and taped the wire into place, use your multimeter to test for continuity between the jack socket cavity and the main cavity. Test from a range of different points from within the cavity (ie. from the pickup cavities). If it beeps, you're good to go!
The Faraday Cage
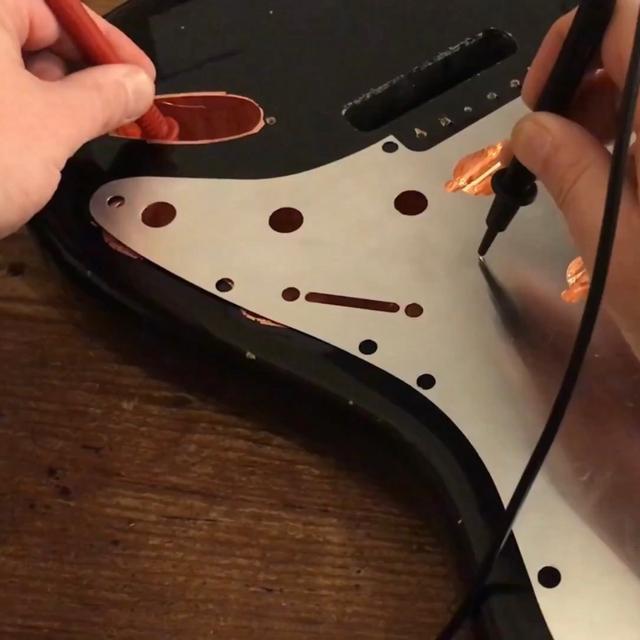
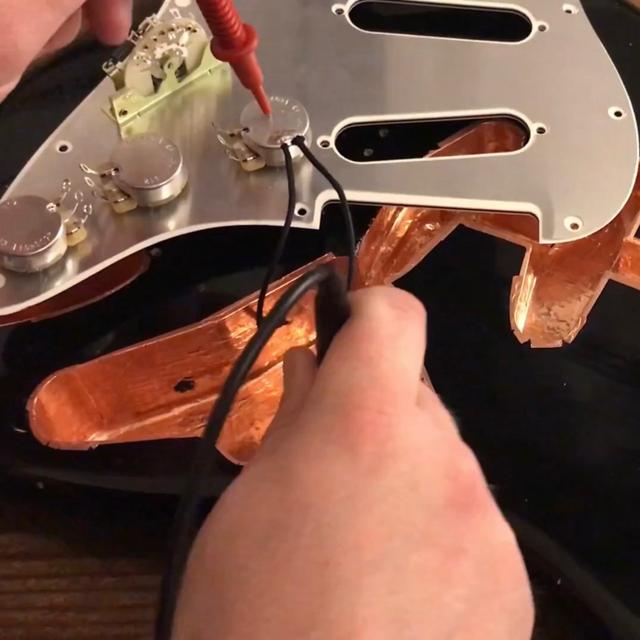
Having completed copper shielding the pickguard and body you now have the makings of a Faraday cage. To test this out, place the pickguard back on top of the body. Using the multimeter, test for continuity between the pickguard and the body as we have done in the below photo. This means, that when you have screwed the pickguard back down you know that the copper or shielding plate underneath the pickguard is connected to the foil in the body - thereby creating the conductive enclosure required.
Grounding
Your Faraday cage currently looks really pretty...however it is useless unless it is well grounded. To do this, connect your main ground coming from the tremolo claw/bridge to the volume pot casing as normal. This now means that the control circuit is grounded.

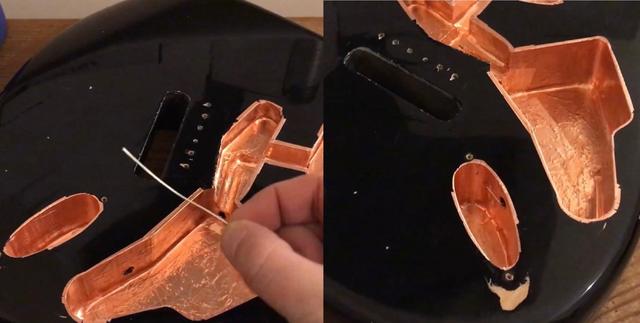
Finally, we need to connect the cavity shielding to the main circuit. To do this, solder a ground wire (we'll use black cloth wire) to the copper tape on the side of the cavity. This then gets soldered to the volume pot as well. Refer to the below photos.
Once this is done, test for continuity between the copper shielding and the casing of the volume pot (ground). If everything beeps, you have successfully created a fully grounded Faraday cage and therefore a well shielded guitar.
There you have it – how to shield a guitar. Unfortunately, RF (radio frequencies) and EMI (electro-magnetic interference) are inevitable with electronic equipment. It is impossible to completely shield your guitar from their waves (short of putting it inside a metal box) but you can go a long way to reducing the impact and unwanted electronic feedback while playing.
More Guides
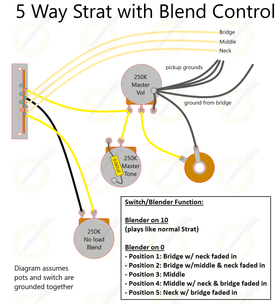
Gilmour Strat Wiring Mod (7 Way Strat)